Last updated: November 17, 2026
Quick Answer: for most buyers, the right three-season room solution comes down to 3 checks: climate, budget, and how often you will use it. In this guide to buying and evaluating three-season room solutions — The Complete Guide, the best path is usually a screened or enclosed system with glass, framing, and roof details chosen for your weather and your site.
Key takeaways
- A three-season room is for comfort in mild weather, not for year-round heat loss control.
- The big decision is not just style; it is how much wind, rain, sun, and temperature swing your site gets.
- A solution that looks cheap at first can cost more later if the roof, drainage, or framing is weak.
- If you want the room to feel like part of the house, the opening system and floor tie-in matter as much as the walls.
- The best choice for a shaded backyard may differ from the best choice for a windy, south-facing deck.
What actually makes a three-season room worth buying?

A three-season room is worth buying when it gives you usable space for about 3 seasons without the cost and code burden of a full year-round addition. That answer changes fast if your main problem is glare, insects, wind, or shoulder-season chill, because each solution handles those differently.
The plain mistake is shopping by looks alone. A product that uses 4-season language in the brochure may still behave like a light enclosure if it has thin glazing, weak sealing, or a roof that was not built for snow load or heavy rain. On the other hand, a simple screened enclosure can be the smartest buy if you mainly want bug control and a place to sit from May through October.
A useful way to judge the options is to ask four questions before you price anything:
- How often will you use it? If the space will sit empty for 6 months, a high-spec enclosure may be too much.
- How severe is the weather it must handle? Wind, sideways rain, and hard afternoon sun matter more than brochure photos.
- Is the room attached to the house or separate? The tie-in to the existing wall, roof, and slab changes both cost and performance.
- Do you want a view, a buffer, or a true room feel? Those are different goals, and no single product is best for all three.
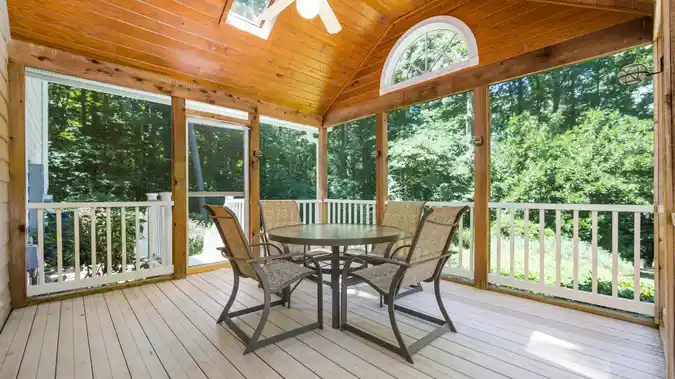
A three-season room is often built with aluminum, vinyl, or wood framing, plus screened panels or glass panels. That means the quality of the frame, the seals, and the roof connection matter more than a flashy name. If the structure sits on a deck, the deck itself must carry the load; if it sits on a slab, water management becomes the first test.
For a quick outside reference on safety and building performance, the U.S. Department of Energy has plain-language material on insulation and air leakage, which helps explain why these rooms are not the same as fully conditioned spaces: https://www.energy.gov/energysaver/insulation. The International Code Council also publishes model code information used by many jurisdictions: https://codes.iccsafe.org/contents. Local code rules still decide what is allowed, and the U.S. Department of Housing and Urban Development also offers general housing and code-related resources: https://www.hud.gov/topics/homes.
Quick check: if you want more comfort than a screened porch but less expense than a full addition, you are in the right category; if you need year-round temperature control, this is probably the wrong product class.
Which three-season room type fits your site?
The right type depends on where the room sits, how exposed it is, and whether you are adding to an existing deck, patio, or foundation. If your site is sheltered, a lighter enclosure can work well; if it faces strong sun or wind, the structure needs better framing, better fastening, and tighter panel fit.
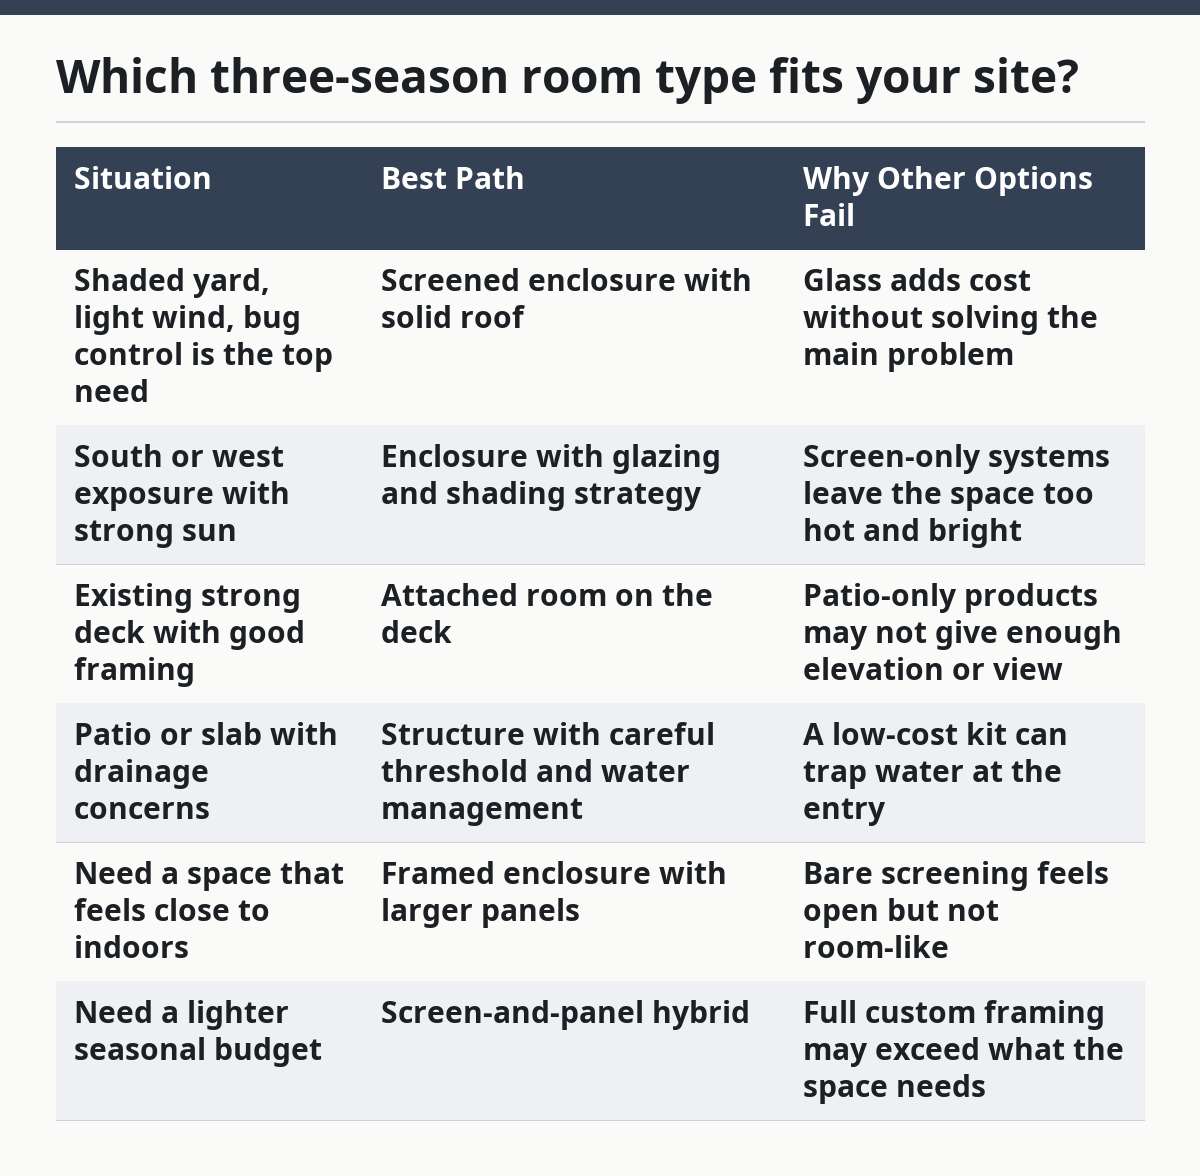
Here is the practical comparison buyers usually need first:
| Situation | Best Path | Why Other Options Fail |
|---|---|---|
| Shaded yard, light wind, bug control is the top need | Screened enclosure with solid roof | Glass adds cost without solving the main problem |
| South or west exposure with strong sun | Enclosure with glazing and shading strategy | Screen-only systems leave the space too hot and bright |
| Existing strong deck with good framing | Attached room on the deck | Patio-only products may not give enough elevation or view |
| Patio or slab with drainage concerns | Structure with careful threshold and water management | A low-cost kit can trap water at the entry |
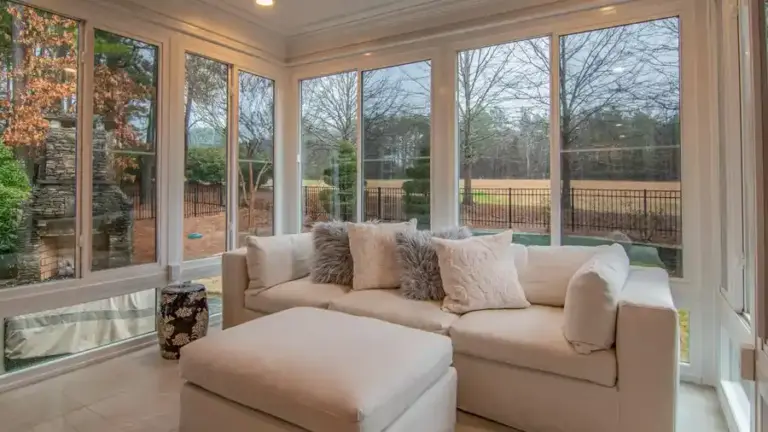
| Need a space that feels close to indoors | Framed enclosure with larger panels | Bare screening feels open but not room-like |
| Need a lighter seasonal budget | Screen-and-panel hybrid | Full custom framing may exceed what the space needs |
If the site is windy, the frame and panel attachment matter more than the style. Thin aluminum with poor fastening can rattle, leak, or flex during storms. If the room faces heavy sun, UV exposure and heat gain become the real enemy, so you want a solution that can accept shades, venting, or glass that does not make the room unusable by noon.
If the home already has a deck, check the deck first, not the room brochure. A room can only be as good as the platform under it, and a deck that was fine for chairs may not be fine for a framed enclosure with roof loads. If the deck is marginal, the honest answer is often to rebuild support first or choose a lighter system.
The wrong buyer for a premium framed room is the person who only wants a summer bug-free spot for a few weekends. The wrong buyer for a simple screen enclosure is the person who wants the room to feel close to a den in September, when evenings turn cool. Those two buyers should not shop the same way.
Quick check: if your site is sheltered and your budget is tight, lighter systems may be enough; if your site is exposed or you want a true room feel, spend more on framing and enclosure quality.
What should you inspect before you compare quotes?

You should inspect the roof tie-in, drainage, framing material, and opening hardware before you compare any quote. Those four items explain most of the price spread between a solid three-season room and a disappointing one that leaks, sags, or feels cheap after the first season.
A quote that only gives a square-foot price is not enough. You need to know what is included in the roof, the wall system, the threshold, the screens or glass, the fasteners, and the finish trim. If a bid is vague about any of those, the missing pieces usually show up later as change orders.
Use this step-by-step path before you sign anything:
- Measure the space footprint and note the existing base: deck, patio, or slab.
- Check the roof condition where the room will attach, including flashing and drainage paths.
- Look for water stains, soft deck boards, cracked slab areas, or settled posts.
- Ask what frame material is being used: aluminum, vinyl, or wood, and where each part appears in the build.
- Ask what panel system is used: screen, fixed glass, sliding panels, or removable panels.
- Confirm how the room will handle rain at the threshold and where water exits the footprint.
- Compare the hardware, seals, and trim, not just the total price.
- Ask whether permits, code review, and structural checks are included or left to you.
The most common failure point is the tie-in between the existing house and the new enclosure. A poor flashing detail can turn a nice room into a repair job in one storm season. Another common miss is drainage at the entry; if the threshold sits wrong, water can collect where people step in and out.
A serious quote should answer three plain questions: how is the roof attached, how does water leave, and what happens if a panel or seal fails later? If the seller cannot answer those clearly, the quote is not ready to compare.
Quick check: if a quote gives you only a price and a pretty rendering, you still do not know enough to buy.
How do you compare materials without getting fooled?
You compare materials by asking what the room must survive for 10 years, not by asking which one looks best on day one. Aluminum, vinyl, and wood each solve a different problem, and each carries a real trade-off.
Aluminum is often chosen for slim lines and low maintenance, but it can feel colder and may telegraph installation mistakes more clearly. Vinyl can reduce upkeep and give a softer interior look, but large spans and heat exposure can make design limits more obvious. Wood can look warmer and match older homes, but it usually needs more care, and moisture management matters more.
The surface material is only part of the story. The glass or screen choice, the seals around panels, and the fasteners used in the frame all affect whether the room stays pleasant from April through October. A weak panel system can make a strong frame feel disappointing.
A practical comparison is below:
| Material | Best Use | Main Strength | Main Weakness |
|---|---|---|---|
| Aluminum | Clean lines, low upkeep, many modern homes | Light, durable frame options | Can feel less warm and may transmit heat or cold |
| Vinyl | Lower-maintenance family spaces | Easy care and simple looks | Can be less flexible for large custom spans |
| Wood | Traditional homes and warm interiors | Classic appearance | Needs more upkeep and careful moisture control |
If you live where summer sun is intense, ask about panel fading, heat buildup, and whether shades can be added later. If you live where spring storms push rain sideways, ask about seals, latch points, and the strength of the panel retention system. Those details matter more than whether the brochure says “premium.”
Do not buy a material because it sounds durable. Buy it because it fits your climate and your willingness to maintain it. A wood room in a damp area can be a poor fit if you do not want regular care. A bare aluminum room can be a poor fit if you want the inside to feel softer and quieter.
For more detail on moisture and energy performance, the U.S. Department of Energy’s guidance on insulation and air sealing is useful context, especially when comparing enclosed rooms and conditioned additions: https://www.energy.gov/energysaver/insulation. For code-related framing and enclosure basics, the International Code Council’s model code library is another practical reference: https://codes.iccsafe.org/contents.
Quick check: if you want the least upkeep, aluminum or vinyl may fit better; if you want the warmest look and accept more care, wood may be worth the trade.
What makes one three-season room solution better than another?
The better solution is the one that matches the room’s job, not the one with the longest list of features. If your goal is to block bugs and let air move, a screened room is often enough; if your goal is to stretch the season into cool evenings, a glazed or hybrid solution is usually better.
The big mistake is paying for features you will not use. A sliding panel system can be excellent when you want flexible opening and closing, but it is not the right answer for a simple casual porch where screens would do the job. A fixed glass enclosure may offer a stronger room feel, but it may also trap heat without shade and venting.
Use this simple decision path:
- List your top need in one sentence: bugs, wind, view, heat control, or room feel.
- Mark the season or month you want the room to work in, such as April, July, or October.
- Check whether you need movable panels or a fixed enclosure.
- Decide whether the room must connect visually to the home interior.
- Compare the cost of adding shading, venting, or stronger panels now versus later.
- Choose the simplest system that satisfies your hardest likely condition.
If the room is for breakfasts, reading, and a quiet chair, simple is often better. If it is for hosting and you want it to feel like an extension of the living room, then opening width, panel clarity, and the transition from indoor floor to outdoor floor matter more. If you want the room to work on cool evenings, ask whether it can hold heat at all or whether it is only a fair-weather shell.
The standard advice to “go custom” is wrong for many buyers. Custom work makes sense when the site is unusual, the roof line is tricky, or the room must match an older house exactly. It is often wasted on a standard patio where a simpler solution would perform just as well for far less complexity.
Quick check: if your top need is one clear function, choose the simplest system that solves that function; if you need the room to do several jobs, expect the cost and complexity to rise.
How do you judge quotes, warranties, and installers?
You judge quotes, warranties, and installers by looking for clear scope, clear exclusions, and a warranty that matches the parts most likely to fail. A lower price is not a deal if it leaves flashing, trim, or installation support outside the contract.
A quote should tell you what is being built, what material is included, what the finish looks like, and what happens if something fails after install. If the paper is thin on details, the builder may be planning to define the job later. That is when budgets grow.
Here is a strong comparison frame:
| Situation | Best Path | Why Other Options Fail |
|---|---|---|
| Vague quote with many allowances | Get a line-item quote before moving ahead | Lump-sum bids hide missing work |
| Installer with no clear permit plan | Ask for permit responsibility in writing | Code issues can stop the project later |
| Short warranty on panels or hardware | Compare parts coverage and labor coverage separately | A parts-only promise may not help when labor is the real cost |
| Lowest price is far below the others | Ask what is excluded | Cheap bids often remove flashing, trim, or cleanup |
A good contract should cover at least these items: scope, materials, timeline, payment schedule, permit handling, change orders, and warranty terms. If the room is attached to the house, ask who handles weatherproofing at the tie-in and who is responsible if leaks appear later.
The installer matters because three-season rooms fail in the seams, not in the sales pitch. A skilled installer can make a moderate product perform well. A rushed installer can make an expensive product feel wrong from day one. That is especially true when the room meets existing roofing, siding, or deck framing.
Do not let the warranty distract you from the build quality. A long warranty on paper does little if getting service is hard or if the warranty excludes the exact part that fails most often. Read the exclusions with the same care you read the promise.
Quick check: if the quote is short on scope but long on promises, keep asking questions until the work is clear enough to price.
What are the edge cases that change the answer?
Edge cases matter because they are the situations where normal advice breaks down. If one of these fits your home, the safer choice may be different from the common recommendation.
-
You live in a very sunny spot with long afternoon exposure.
What changes: heat and glare become the main problem, even more than rain.
What to do instead: prioritize shading, glass or panel choices that reduce heat gain, and venting strategy before you worry about decorative trim. -
Your existing deck is older or questionable.
What changes: the room’s load may exceed what the deck was designed to carry.
What to do instead: have the deck structure checked before buying a room, or choose a lighter enclosure if the deck cannot be upgraded. -
You want the room to function from early spring into late fall.
What changes: temperature swings matter more than bug control.
What to do instead: choose a more sealed, more panelized system and plan for shade and airflow, not just screening. -
The home is older and the roof line is awkward.
What changes: attachment points and flashing become harder.
What to do instead: avoid a cookie-cutter kit unless it is clearly adaptable; custom framing may be necessary to avoid leaks and mismatched lines. -
You are trying to keep the project modest.
What changes: every upgrade has to justify itself.
What to do instead: strip the project back to the minimum that fixes your real problem, such as bug control or shade, and skip extra features that do not change daily use. -
You want the room to look and feel like a finished interior.
What changes: doors, flooring transition, and trim matter as much as the enclosure itself.
What to do instead: spend on the details that create a room feel, and accept that a basic screen setup will not meet that goal.
The normal advice fails when the site itself sets the limit. A room that is perfect for a calm, level patio can be a bad choice for a deck with movement, a roof that sheds water poorly, or a wall that cannot accept a clean tie-in. That is why the “best” solution is often the one that handles the hardest condition on your property.
Quick check: if your site has strong sun, a weak deck, an awkward roof, or a strong wish for an indoor feel, you are in an edge case and should not shop by standard brochure logic.
How should you make the final decision?
You should make the final decision by matching the room to the hardest condition it must survive and then comparing only the solutions that pass that test. If two options both work, choose the one with the simpler maintenance, clearer warranty, and better installation support.
A good final pass looks like this:
- Write your real use case in one line: “morning coffee from April to October,” “bug-free dinners,” or “extra room in cool weather.”
- Identify the hardest weather condition the room must face: heat, wind, rain, or chill.
- Check the base structure, roof tie-in, and drainage one more time.
- Compare the lowest bid against the most complete bid line by line.
- Remove any feature you do not need in the first year.
- Choose the system that solves your use case with the fewest moving parts.
If your goal is casual seasonal use, a simpler screen-plus-panel option may be the smartest spend. If your goal is a room that feels close to the house for most of the warm season, a better-framed enclosure is usually worth the extra cost. If your goal is truly year-round comfort, stop calling it a three-season room and move into a full addition plan.
The most honest buying rule is this: pay for weather protection, structure, and water control before you pay for extras. Fancy trim, decorative details, and broad sales claims do not keep the room usable in August heat or October rain. A room that works on the bad days is the one you keep using.
Quick check: if you can name the room’s hardest condition and the simplest solution that solves it, you are ready to choose.
What questions should you ask before you buy?
You should ask direct questions about structure, water control, and what is excluded from the price. If the answers are vague, the project is not ready.
How do I know if a three-season room is enough, or if I need a full addition?
A three-season room is enough if you mainly want a space for mild weather and do not need year-round comfort. If you need dependable heating and cooling, better insulation, and interior-level comfort in winter, a full addition is the better path. That difference matters because three-season rooms are usually built for comfort in part of the year, not all 12 months.
What is the biggest mistake buyers make?
The biggest mistake is choosing the room style before checking the site. A beautiful enclosure can fail if the deck is weak, the roof tie-in is poor, or drainage is ignored. A strong structure in the wrong place is still the wrong purchase.
Should I choose screen, glass, or a hybrid system?
Choose screen if bugs and airflow are the main issue, glass if you want more enclosure and longer shoulder-season use, and hybrid if you need flexibility. The right answer often comes down to heat, wind, and how much you want the room to feel like an indoor space. A hybrid system is often the middle path, but it is not always the cheapest.
What should a good quote include?
A good quote should include materials, labor, roof tie-in, threshold details, hardware, finish trim, permit responsibility, and warranty terms. If the quote leaves out any of those items, expect either confusion later or extra charges. Ask for the exclusions in writing so you can compare bids fairly.
Is the cheapest option ever the right one?
Yes, but only when your needs are simple and the site is easy. If the room is mainly for seasonal bug control on a sheltered patio, a lower-cost system may be enough. If the site is exposed or the room must feel more like a finished interior, the cheapest quote is often the wrong one.
A final note on sources and standards: building rules vary by location, so local code review matters more than any general guide. The International Code Council and the U.S. Department of Energy are useful starting points for understanding code and comfort basics, but the actual permit path depends on where the room is being built.
Drafted with AI; not yet reviewed by a person.